Poppler is a PDF rendering library based on the xpdf-3.0 code base. It has bindings for Qt4 which we can use through Python/PyQt. Using these libraries under most popular Linux distributions is as simple as installing the Poppler package, but under Windows I’ve found that things are a little more tricky to get working.
At work, with the main business being document scanning, we deal with PDF files a lot. I’ve written a few custom applications that allow people to use the PDF files that we have supplied for them. Some of the applications simply launch the PDF in the user’s default viewer when it is chosen from a list. Others use an embedded version of Adobe’s Acrobat Reader which has to first be installed on the user’s machine.
Acrobat Reader doesn’t play very well with apps written in PyQt in my experience. I don’t really like the idea of having to use an entire program (and Acrobat Reader is a little hefty) embedded in my software just to view a file. Although I was able to load files into the embedded Acrobat Reader and adjust the display preferences I found that the application focus was left with Acrobat Reader after each change. For example, I connected a QSlider to some code to adjust the zoom of the document and all worked fine when using the mouse. Selecting the QSlider with the keyboard and attempting to use it didn’t. Once the zoom had moved one step the focus would be taken from the QSlider and left with Acrobat Reader, meaning that further adjustments from the keyboard required the re-selecting of the QSlider. I tried to find a way around this. I failed.
I went in search of an alternative to Acrobat Reader and found Poppler. Based on the xpdf-3.0 codebase and released under the GPL this seemed to be exactly what I needed. It would let me view PDF files in my PyQt application without having to use Acrobat Reader along with letting me perform a few other PDF related tasks. Great.
I tried to get it to work on Windows. Oh, I tried. I’m not that experienced a programmer and don’t know a great deal about compiling C code. I headed over to the Poppler mailing list and although there were a few people asking how they could use Poppler on Windows there were not that many answers. At least, nothing that I was able to follow. A few people seem to be searching for the term ‘How to compile Poppler on Windows’, but there was nothing really that I could use.
In my Ubuntu Linux installation I was able to use Poppler simply by installing the package. I wrote a quick test program to view a PDF and it worked great and was a lot faster than I expected at rendering the pages. Unfortunately at work I use Windows, as do pretty much all of our customers. A few months went by with a couple more failed attempts at getting things to work and then last week I actually managed it. It’s cheating a little; I’m using the installer from the KDE Windows Initiative to help me along, but it works and gives me a usable Poppler library that I can use from within PyQt on Windows. This is by no means the only way and there are many projects that use Poppler on Windows quite successfully, but this is a fairly simple way to get things set up and working and I thought I should post a guide on how to do it.
Download List
First of all there are a few things that you will need to download.
Python
http://python.org/download/
Personally I’m still using version 2.x of Python. At the time of writing the most recent of this branch is 2.7.1, so click the link for ‘Python 2.7.1 Windows Installer’ at the download link and install it if you don’t already have Python set up on your machine.
Qt SDK
http://qt.nokia.com/downloads
We don’t have to compile all of Qt. We can get away with just downloading the SDK installer which gives us the files we need for the other things we’ll be compiling. Choose LGPL from the download page and download the installer that at the time of writing is labelled ‘Qt SDK for Windows* (322 MB)‘. This gives me an install of Qt 4.7.0 (2010/05).
SIP
http://www.riverbankcomputing.co.uk/software/sip/download
SIP is a set of bindings for using C/C++ libraries with Python. You’ll need to have this compiled and installed before we build PyQt. The latest version for me right now is 4.12.1. Download the Windows Source archive.
PyQt4
http://www.riverbankcomputing.co.uk/software/pyqt/download
This is the package that performs the magical task of making Qt work with Python. There are binary files available that install the necessary Qt, SIP and PyQt4 files needed for normal PyQt4 tasks. These cannot be used if you want to use Poppler. The PyQt4 binaries for Windows available at the Riverbank Computing site are compiled using Microsoft Visual Studio. In order to use Poppler in PyQt4 on Windows we need to also compile pypoppler-qt4, which I’ll be compiling with MinGW. For pypoppler-qt4 to work we need to first compile PyQt4 ourselves using MinGW to make things compatible. It may be possible to use the Microsoft Visual Studio compiler to compile pypoppler-qt4, but that’s not something I have installed or have ever used. This is what caused a lot of my problems the first time I tried to get things working. The latest version of PyQt4 as I’m writing this is 4.8.3 and again you’ll need to download the Windows source package.
KDE
http://windows.kde.org/
The KDE Windows Initiative has done the hard work of compiling Poppler (along with it’s various dependencies) for us. To save us having to do the same thing we can just download the Windows installer and use it to grab the files we’ll need to compile pypoppler-qt4. Choose Download Installer from the Download menu on the linked page.
pypoppler-qt4
http://svn.pardus.org.tr/uludag/trunk/playground/pypoppler-qt4/
I’ve given the link here for the download location for the pypoppler-qt4 source, it’s up to you whether you download this with a Subversion client or through your web browser. If using a web browser just download all the files one at a time. There aren’t that many, just six at the time of writing including the license information and authors list. If you’re downloading using a Subversion client we’ll make a new folder called ‘src’ on the root of the drive. Switch to it and issue the command for Subversion to download the source that we need. The steps for this in the command prompt are:
cd c:\
mkdir src
cd src
svn checkout http://svn.pardus.org.tr/uludag/trunk/playground/pypoppler-qt4/
If your Subversion client isn’t in your path you’ll need to type the full path to your svn binary. If using the Slik SVN client mentioned in the optional installs below this would mean replacing ‘svn’ above with ‘C:\Program Files\SlikSvn\bin\svn.exe’ if you installed the 32-bit version to the default folder.
I wasn’t able to get this to compile on Windows as it was but I had success with the configure.py file from the SlidePresenterView project’s modifications. If you have Bazaar installed you can get the latest version by entering:
bzr branch lp:~spv-dev/slidepresenterview/pypoppler-qt4
into your command prompt. Otherwise you can download the copy I used from here.
Optional Downloads
These aren’t actually needed to get things working, but are recommended.
pywin32 / Python for Windows extensions (optional)
http://sourceforge.net/projects/pywin32/files/pywin32/Build%20214/
Not actually needed for this tutorial, but if you’re using Python on a Windows machine it’s a pretty good idea to have it and should be part of your standard install. I’m using the file labelled ‘pywin32-214.win32-py2.7.exe’ to go with my Python 2.7.1 install. You’ll need to download a different install if your version of Python differs.
setuptools – (optional)
http://pypi.python.org/pypi/setuptools Again, not actually needed for the tutorial but something that you should have anyway for easily installing PyPI packages along with their dependencies. The current version as of now is 0.6c11 – if you’re using Python 2.7.x as described above go ahead and download the file marked ‘setuptools-0.6c11.win32-py2.7.exe’, otherwise substitute for your setup.
Slik SVN, or any Subversion client (optional)
http://www.sliksvn.com/en/download
It doesn’t have to be slik subversion – any subversion client will do if you already have one installed. We’ll need this to download the pypoppler-qt4 source, unless you want to just download the files manually through your web browser. It’s a good idea to have a Subversion client installed though if you’re going to play with new bits of software. I grabbed slik subversion 1.6.15.
QScintilla2
http://www.riverbankcomputing.co.uk/static/Downloads/QScintilla2/QScintilla-gpl-2.4.6.zip
A Qt port of the Scintilla C++ editor control. This is a required install if you also want to install Eric4.
Eric4
http://sourceforge.net/projects/eric-ide/files/eric4/stable/4.4.12/eric4-4.4.12.zip/download
My favourite IDE for writing PyQt applications on Windows and Linux. The current version at the time of writing is 4.4.12.
You should now have all the files needed to work through this tutorial.
Step 1 - Installing Python
This should be nice and easy. If you’re reading this tutorial then I’d imagine you’re a Python user with Python installed already. If not, just run the installer and follow the instructions. Although not needed directly for this tutorial I’d recommend installing pywin32 and setuptools as well at this point.
Step 2 - Installing Qt SDK
Another easy one. Again, just run the installer and follow the instructions if you don’t already have the Qt SDK installed.
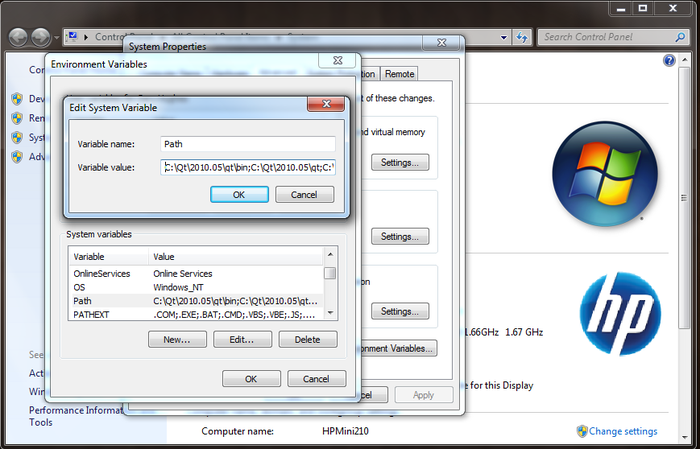
You also need to add a few folders to your system’s path environment. This is something that has had me screaming ‘WHY?!’ at my screen quite a bit – it turns out that the order that these folders appear in your list are quite important. On my machine the three folders that needed adding (and in this order too) were:
C:\Qt\2010.05\qt
C:\Qt\2010.05\bin
C:\Qt\2010.05\qt\bin
To add these to your system path, right click on My Computer on the desktop (or the ‘Computer’ entry in the Start Menu) and choose ‘Properties’, followed by ‘Advanced System Settings’ from the menu on the left of the new window that appears. Typing ‘sysdm.cpl’ in the Run Dialog and clicking the Advanced tab will also get you here. Click the Environment Variables button at the bottom of the window and then from ‘System variables’ highlight ‘Path’ and click the Edit button. Enter these three paths (or the versions of them that match the setup on your machine) into the ‘Variable value’ box and separate them by a semicolon. Make sure they’re the first items in there and that you include a semicolon after all three folder paths so that your existing items are separated out.
Step 3 - Installing SIP
First of all you must unzip your sip archive to a folder on your hard drive. I’ll be keeping all of my source code for this tutorial in a folder called ‘src’ at the root of my C drive. Using a folder without spaces and close to the root of your drive just makes things a little easier when we’re working with a command prompt.
The Qt SDK, along with the header files we need for our building, installs a copy of the MinGW compiler. I ran into a few problems with folders in my Windows system path conflicting with the files from the Qt SDK before finally finding out that the Qt SDK provides a batch file that opens a command prompt and, inside it, clears your system’s path variable and sets a few other variables needed for our compiling. This console can be started by clicking Start –> All Programs –> Qt SDK by Nokia v2010.05 (open source) –> Qt Command Prompt.
Switch to the folder containing your SIP source code. You may normally start Python scripts in Windows by either directly running the ‘.py’ file or by typing ‘python’ followed by the name of your file in a command prompt. You don’t need the full path because the Python installer adds the python.exe to your system path. Since we’re in Qt’s customised terminal Python is no longer in our path (at least, not in this command prompt instance) so we must call the python.exe using it’s full path, changing it if your version differs from mine. Run the configure script through Python passing it the ‘-p win32-g++’ argument:
cd \src\sip-4.12.1
c:\Python27\python.exe configure.py -p win32-g++
You should see some text scroll through the window ending in ‘Creating sip module Makefile…’. Once done type two more commands to build and then install SIP:
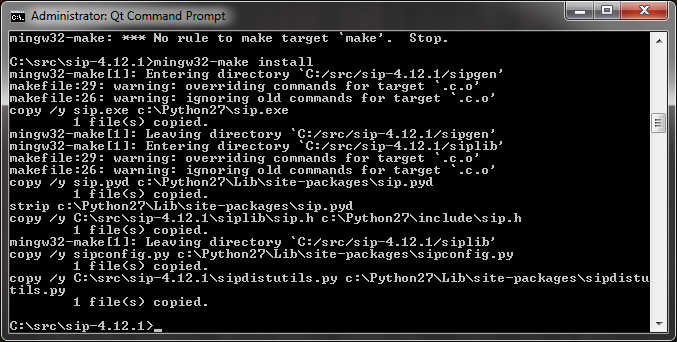
mingw32-make
mingw32-make install
SIP should now be installed and your command prompt should look something like this:
Step 4 - Installing PyQt4
This is pretty similar to installing SIP. I’m using the commercial version of PyQt4, but this should work the same for the GPL version. Unzip your PyQt4 source to c:\src and if you’re using the commercial version you must also add your pyqt-commercial.sip file (available from your account page on the Riverbank site) in the ‘sip’ folder within your PyQt4 source folder (‘C:\src\PyQt-win-commercial-4.8.3\sip’ in my case).
In the Qt command prompt that you have left over from installing SIP switch to your PyQt4 source folder and run PyQt4’s configure script through Python with the ‘-w’ switch.
cd \src\PyQt-win-commercial-4.8.3
c:\Python27\python.exe configure.py –w
If asked to accept the license type ‘yes’ followed by the enter key to proceed. After a couple of minutes this ends with the text ‘Creating pyqtconfig.py…’ on my machine.
As with SIP we now compile the source by entering:
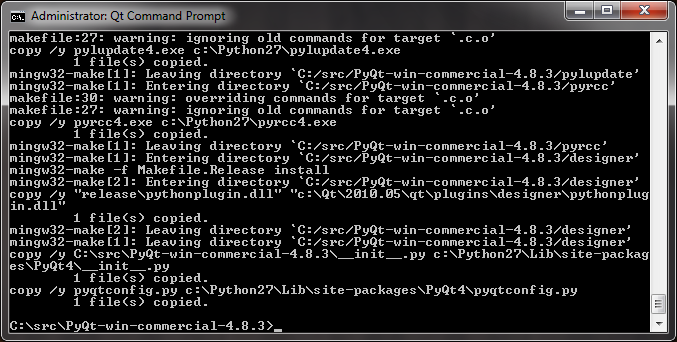
mingw32-make
mingw32-make install
This should take a few minutes to complete and your console window should look something like this when finished.
We just need to check that everything installed ok and that we can actually import and use PyQt. Open up a new Python terminal (IDLE is fine, or you could just use the console window you already have open) and type the following:
from PyQt4.Qt import *
from sip import *
print [SIP_VERSION_STR, QT_VERSION_STR, PYQT_VERSION_STR]
This should return:
['4.12.1', '4.7.0', '4.8.3']
or whatever versions of SIP, Qt and PyQt respectively that you installed. So long as you get numbers and not an error you should be ok.
Step 5 - Installing Poppler (via KDE Installer)
So here’s the bit where we cheat a little (thanks, KDE!). Run the installer and select the option ‘Install from Internet’. I’ve set the install path on my machine to ‘c:\kde’. When asked about the Install Mode choose ‘Package Manager’ and ‘MinGW4 W32’. I went with the download server ‘Central Europe, Germany (http://www.winkde.org)’ after trying a few that were a little closer to me but didn’t have the latest KDE version. Once you’ve chosen the latest version you’ll want to download the following packages:
- poppler-mingw: Bin and Devel version
- poppler-data: Bin version
- freetype-mingw: Bin version
- jpeg: Bin version
- libpng: Bin version
- libxml2: Bin version
- iconv: Bin version
- zlib: Bin version

Once these are selected hit ‘Next’ then ‘Finish’ to install.
Once installed we need to add the KDE ‘bin’ folder (‘c:\kde\bin’ in my install – adjust this if you installed KDE to a different folder) to the system path like we did for Qt in Step 2 and then we’re done.
Step 6 - Installing pypoppler-qt4
You should already have the pypoppler-qt4 source checked out of SVN from the download list at the top of this tutorial. If not, go back and do that now.
Next, download this version of the configure.py file and replace the version from your SVN checkout with it. This will allow us to specify where our Poppler libraries (thank you again, KDE Installer) are with this command (all on one line):
c:\Python27\python.exe configure.py --popplerqt-includes-dir ^
    c:\kde\include\poppler --popplerqt-libs-dir c:\kde\bin
The configure script should then tell you where it will be installing it’s files:
Using PopplerQt include paths: ['c:\\kde\\include\\poppler']
Using PopplerQt libraries paths: ['c:\\kde\\bin']
Configured to install SIP in c:\Python27\sip
Configured to install binaries in c:\Python27\Lib\site-packages
If the paths look correct and match what you passed the configure.py script then go ahead and run:
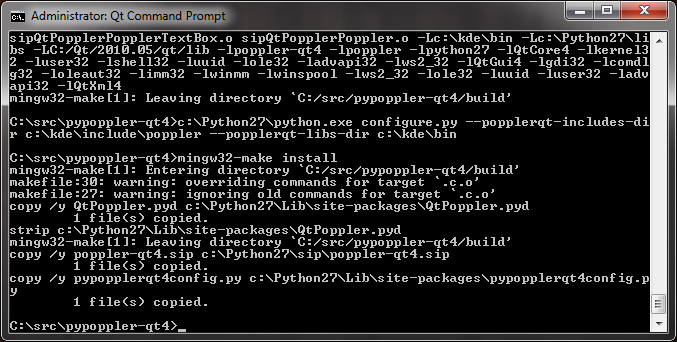
mingw32-make
mingw32-make install
When complete your command prompt should look something like this:
Step 7 - Installing other optional files.
I swear by using eric4 for developing in PyQt. It’s a decent IDE and integrates well with the PyQt stuff allowing you auto compile any changed GUI elements automatically when running your project along with providing UIs for generating code for interface components and lots of other nice things.
It also depends on QScintilla for displaying code. This is something that comes standard with the PyQt4 setup binaries for Windows but we’re installing from source so if you need QScintilla you’ll need to compile that too.
Unpack the source archive into c:\src as with our other source packages. Once again in the Qt command prompt type the following from the QScintilla source folder:
cd Qt4
qmake qscintilla.pro
mingw32-make
mingw32-make install
Once installed you’ll need to copy the qscintilla2.dll file from your Qt Lib folder to your Qt Bin folder.
copy c:\Qt\2010.05\qt\lib\qscintilla2.dll c:\Qt\2010.05\qt\bin
And finally we compile the Python wrappers. Switch back to the root of your QScintilla source folder and then switch into the Python folder (replace for the path to your QScintilla source folder if needed):
cd C:\src\QScintilla-commercial-2.4.6\Python
c:\Python27\python.exe configure.py
mingw32-make
mingw32-make install
To install eric4 you’ll just need to unpack the zip archive and execute:
c:\Python27\python.exe install.py
from within the unpacked folder. Eric4 can be started by running the eric4.bat file that has been created in your Python folder.
Testing - Making sure it all works.
Now that everything is installed it’s time to see if it all works. Make sure you have a PDF file somewhere on your computer for testing and fire up a Python interpreter.
import QtPoppler
doc = QtPoppler.Poppler.Document.load('c:/test/test.pdf')
doc.numPages()
This should return the number of pages in your PDF file. For my PDF it returned a count of 641 pages:
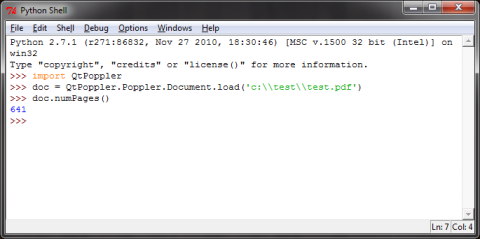
If QtPoppler imported without any errors and returned a pagecount after calling numPages() on a loaded document then everything is working. To jump in and start doing things with PDF pages you can render them to a QImage and display however you would normally display a QImage in your program:
doc.page(0).renderToImage()
Specify your page number as a parameter to doc.page() – page numbers start from zero.
For more information refer to the Poppler Qt4 documentation.
Comments
comments powered by Disqus